
Your memory foam pillow: it’s the supportive, contouring haven that cradles your head night after night, promising restful sleep and waking up without a stiff neck. You love the way it adapts to your shape, offering personalized comfort. But what happens when life happens – a spill, a sniffle, or just the inevitable accumulation of dust mites and allergens? You know you need to clean it, but the thought of getting that dense, spongy material wet brings a wave of panic. How do you dry a memory foam pillow without ruining its unique properties?
This is where many pillow owners face a dilemma. Unlike traditional fiberfill or down pillows that can often be tossed into a hot tumble dryer, memory foam requires a completely different approach. Using high heat is a surefide way to damage the foam, potentially causing it to crumble, harden, lose its supportive qualities, or even worse, melt or pose a fire risk. And failing to dry it completely creates a breeding ground for mold, mildew, and bacteria, turning your comfortable haven into a hygiene hazard.
Fear not! Cleaning and, more importantly, safely drying your memory foam pillow is absolutely possible. It just requires patience and the right technique. This comprehensive guide will walk you through the why and the how, ensuring your beloved pillow remains clean, fresh, and perfectly functional for years to come.
Why Drying Memory Foam is a Different Ballgame
Understanding why memory foam is so sensitive to heat and moisture retention is the first step in caring for it correctly. Memory foam, or viscoelastic polyurethane foam, is a material designed to react to heat and pressure.
- Heat Sensitivity: The viscoelastic property means it softens and conforms when exposed to heat (like your body heat). While this is great for comfort, excessive heat, especially the kind generated in a tumble dryer, can break down the chemical structure of the foam. This leads to:
- Crumbling or Disintegration: The foam can become brittle and start to fall apart.
- Hardening: The soft, conforming nature can be permanently altered, leaving you with a stiff, unsupportive pillow.
- Melting/Shrinking: In severe cases, high heat can cause the foam to shrink or even partially melt, distorting the pillow’s shape beyond repair.
- Density and Moisture Retention: Memory foam is much denser than traditional pillow fillings. While this density provides excellent support, it also means the foam is highly absorbent and holds onto moisture like a sponge. This poses a dual problem during drying:
- Slow Drying Time: The dense structure makes it difficult for air to circulate and moisture to evaporate quickly.
- Mold and Mildew Risk: If even a small amount of moisture is left deep within the foam, it creates the perfect dark, damp environment for mold and mildew to grow. This not only causes unpleasant odors but can also trigger allergies and respiratory issues.
Therefore, traditional high-heat drying methods are out. The goal is to remove moisture thoroughly without applying damaging heat.
The Dangers of Getting it Wrong: What Happens If You Dry Your Pillow Incorrectly?
The consequences of improperly drying a memory foam pillow are significant and can range from minor annoyances to completely ruining the pillow:
- Damage to the Foam Structure: As mentioned, heat can cause irreversible damage, leading to loss of support, crumbling, or hardening. The pillow will no longer provide the ergonomic benefits you bought it for.
- Permanent Odors: If mold or mildew takes hold due to incomplete drying, a persistent musty or mildewy smell will develop. This odor is incredibly difficult, if not impossible, to remove once it’s set in deep within the foam.
- Hygiene Issues: Mold, mildew, bacteria, and dust mites (which thrive in damp environments) can proliferate, turning your pillow into an unhygienic cesspool. This is particularly problematic for allergy sufferers.
- Reduced Lifespan: Incorrect drying accelerates the degradation of the material, drastically shortening the lifespan of an otherwise durable pillow. You’ll find yourself needing to replace it much sooner than anticipated.
- Potential Safety Hazard: While less common with the focus on drying after cleaning, putting anything damp that retains moisture easily into a high-heat appliance like a dryer carries a theoretical risk, though the primary risk with memory foam is foam damage itself.
Clearly, getting the drying process right is crucial for both the longevity of your investment and your own health and comfort.
Preparation is Key: Gently Removing Excess Moisture
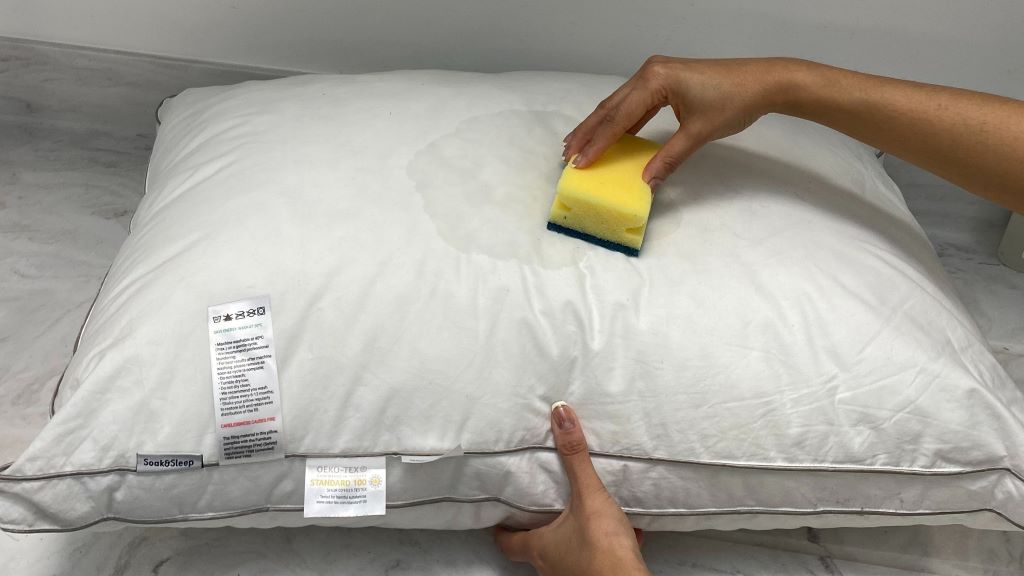
Before you even begin the actual drying process, the crucial first step after cleaning your memory foam pillow (whether you’ve spot-cleaned a small area or carefully hand-washed the entire core, following specific washing instructions for your pillow type) is to remove as much excess water as possible, without damaging the foam.
- Gentle Squeezing: This is paramount. NEVER wring, twist, or aggressively squeeze your memory foam pillow. This can tear or distort the foam structure. Instead, gently press down on the pillow with open hands, working from the center outwards towards the edges. Imagine you’re trying to coax the water out, not force it.
- Use Absorbent Towels: Lay the damp pillow flat on a thick, clean towel. Cover it with another thick towel. Gently press down or even roll the pillow up in the towels (like a sleeping bag) and gently press on the rolled bundle. The towels will absorb a significant amount of moisture. Repeat this process with dry towels until you’ve extracted as much water as you can through gentle pressure.
This initial step significantly reduces the overall drying time and minimizes the risk of moisture being trapped deep within the core.
The Gold Standard: Air Drying Your Memory Foam Pillow Safely
Without a doubt, air drying is the safest, most recommended method for drying a memory foam pillow. It eliminates the risk of heat damage while allowing the moisture to evaporate naturally over time. This method requires patience, but the results are worth it.
Here’s a step-by-step guide to effectively air drying your memory foam pillow:
- Choose the Right Location: Select a well-ventilated area for drying. Good airflow is the most critical factor for successful air drying.
-
Indoors:
-
A room with open windows, near a fan, or in a dry basement are good options. Avoid damp areas like bathrooms or humid basements without ventilation.
-
-
Outdoors:
-
A porch, deck, or clothesline on a dry, breezy day can be ideal.
2. Avoid Direct Sunlight (with Caution): While sunlight provides natural warmth and can help with sanitation, prolonged exposure to direct, intense sunlight can still generate enough heat to potentially damage some types of memory foam over time. A little indirect sun or morning sun is generally fine, but it’s safer to dry in a shaded, breezy spot outdoors, or indoors near a sunny window but not directly in the path of intense rays. Check your pillow’s specific care instructions if they mention sun exposure.
3. Ensure Air Circulation on All Sides: Laying the pillow flat on a solid surface can trap moisture underneath. To maximize airflow, try one of these methods:
-
-
Elevated Rack:
-
Place the pillow on a drying rack, laundry rack, or even a few chairs placed side-by-side. This allows air to circulate freely around the top, bottom, and sides.
-
-
Hanging (with Support):
-
If you hang the pillow (e.g., on a clothesline), ensure it’s well-supported to prevent stretching or distorting its shape while wet and heavy. Using a mesh laundry bag can help maintain its form.
4. Utilize Fans: Placing a fan (box fan, oscillating fan) near the drying pillow significantly speeds up the evaporation process by continuously moving air across the surface. Position the fan so it directs airflow towards or across the pillow.
5. Flip and Rotate Regularly: To ensure even drying and prevent moisture pockets, flip the pillow every few hours. Rotate its position on the rack or change the angle of the fan. This helps expose all parts of the core to the air.
6. Be Patient – It Takes Time: This is the most important rule of air drying memory foam. Depending on the pillow’s size, density, humidity levels, and airflow, drying can take anywhere from 24 to 72 hours, or even longer. Do not rush this process.
7. Test for Complete Dryness: How do you know it’s truly dry?
-
- Feel: Press firmly into the thickest part of the pillow. Does it feel cool or damp? It should feel dry and at room temperature throughout.
- Weight: A damp pillow will feel noticeably heavier than a dry one.
- Smell: A clean, dry pillow should have little to no odor. Any musty or damp smell indicates residual moisture.
Only return the pillow to your bed or put a pillowcase on it when you are absolutely certain it is dry all the way through. Even slight dampness can lead to mold growth.
Using a Dryer: Proceed with Extreme Caution (Air Cycle ONLY)
While air drying is the preferred method, some pillow care labels might mention using a dryer on a specific setting. However, this is generally discouraged for most memory foam pillows due to the high risk of heat damage.
If you absolutely must use a dryer (and have confirmed the care label allows it on a no-heat setting):
- STRICTLY Use “Air Dry” or “No Heat” Setting ONLY: This is non-negotiable. Any setting that introduces heat, even low heat, can damage the foam. The “Air Dry” setting simply tumbles the pillow with room-temperature air.
- Add Dryer Balls or Clean Tennis Balls: Place a few clean dryer balls or tennis balls in the dryer with the pillow. These help to gently agitate the pillow and create airflow around it, aiding the drying process. Ensure the balls are clean and colorfast if using tennis balls.
- Check Frequently: Pause the dryer every 15-20 minutes to check the pillow’s temperature and dampness. If it feels warm at all, stop the process immediately and switch to air drying.
- Understand Limitations: Even on an air-only cycle, a dryer may not be able to completely dry the dense core of a memory foam pillow. You may still need to finish the drying process by air drying to ensure it’s thoroughly dry.
Given the risks, using a dryer for memory foam is generally not recommended and should only be considered as a very limited supplemental step on an air-only cycle, followed by extensive air drying. Air drying alone is the safest path.
How Long Does Drying Really Take? Managing Expectations
As highlighted earlier, drying memory foam is not a speedy process. It’s essential to manage your expectations to avoid putting a potentially damp pillow back into use.
Factors influencing drying time include:
- Pillow Size and Density: Larger, denser pillows will take longer to dry than smaller, less dense ones.
- Amount of Moisture: How much water was initially in the pillow? The better you squeezed out excess water initially, the faster it will dry.
- Humidity: High humidity in the drying environment will significantly slow down evaporation.
- Temperature: Warmer (but not hot!) temperatures can help, but airflow is more critical than heat.
- Airflow: A well-ventilated area with good airflow (especially with the aid of fans) will dry the pillow much faster than a stagnant space.
Plan for your pillow to be out of commission for at least 24-72 hours. In humid conditions or for very thick pillows, it could take even longer. Patience is your best tool here.
Signs Your Pillow Might Still Be Damp (And Why It’s Risky)
It’s worth reiterating the importance of ensuring your pillow is completely dry before using it again. Signs of residual moisture include:
- Coolness to the Touch: Even if the surface feels dry, press deep into the foam. If it feels cool, it likely still contains moisture.
- Heaviness: A damp pillow will be heavier than when it’s completely dry.
- Musty or Mildewy Smell: This is a strong indicator of trapped moisture and potential microbial growth.
Putting a damp pillow back on your bed or covering it with a case traps the moisture inside, creating the perfect environment for mold and mildew to flourish rapidly. This compromises both hygiene and the pillow’s structural integrity.
Preventative Care: Reducing the Need to Wash and Dry
The best way to deal with the challenging drying process of a memory foam pillow is to minimize the need for full washing in the first place. Implement these preventative measures:
- Use a Pillow Protector: Invest in a high-quality, zippered pillow protector, preferably one that is waterproof or water-resistant and breathable. This acts as a barrier against sweat, oils, spills, and dust mites, keeping the foam core clean. The protector can be easily removed and washed frequently.
- Spot Clean When Possible: For minor spills or stains, try to spot clean only the affected area using a damp cloth and a small amount of mild detergent. Avoid saturating the foam unnecessarily.
- Aerate Regularly: Even without washing, airing out your pillow periodically can help refresh it and dissipate minor odors. Remove the pillowcase and protector and let the pillow sit in a well-ventilated area for a few hours every few months.
These simple steps can significantly extend the time between full washes and make the overall care of your memory foam pillow much easier.
When Drying Isn’t Enough: Signs It’s Time to Replace
Even with the best care, memory foam pillows don’t last forever. Improper drying can accelerate their demise. If you notice any of the following, it might be time to consider replacing your pillow, regardless of how well you try to dry it:
- Permanent Odors: If a persistent musty or unpleasant odor remains even after thorough cleaning and drying, it likely means mold or mildew has permeated the foam too deeply to remove.
- Crumbling or Hardening: If the foam is starting to break down, crumble when squeezed, or has lost its ability to conform and feels hard or lumpy, its structure is compromised, often due to age or heat exposure.
- Loss of Support: If the pillow no longer springs back or provides the support it used to, it has lost its viscoelastic properties and is no longer effective.
While proper drying helps maintain the pillow, it can’t reverse damage or the natural aging process of the material.
Recap: Your Safe Memory Foam Drying Checklist
To summarize the key takeaways for safely drying your memory foam pillow:
- Prioritize Air Drying: It’s the safest method, eliminating the risk of heat damage.
- Be Patient: Allow plenty of time (24-72+ hours) for complete drying.
- Maximize Airflow: Use elevated racks, fans, and flip the pillow regularly.
- Avoid Heat at All Costs: Never use a heated dryer cycle. If using a dryer, use only the “Air Dry” or “No Heat” setting with extreme caution and check frequently.
- Ensure Complete Dryness: Check by feel, weight, and smell before using the pillow again.
- Preventative Care: Use a protector and spot clean to reduce the frequency of full washes.
Conclusion
Caring for your memory foam pillow, particularly the drying process, might seem daunting at first. However, by understanding the unique properties of the material and following the safe, recommended steps for air drying, you can ensure your pillow remains a clean, fresh, and supportive part of your sleep routine for years to come. Patience and proper technique are your best allies. So, the next time your memory foam pillow needs a refresh, you’ll know exactly how to dry it safely, preserving its comfort and keeping your sleep sanctuary healthy and inviting. Sweet dreams!
Read More:

